Friday, May 16, 2014

Flower Juice

We like to keep up our British traditions here in France and so in May and June we go off foraging the blossoms of the elder shrub to make elderflower cordial.

The children love walking around country lanes, snipping the large flowers heads into a basket to make what they call 'flower juice'.
Once harvested, the flowers of this rather ill thought of shrub ( some may say weed),can be infused in a sugar syrup that when combined with sparkling water, ice and a slice of lemon, makes the most refreshingly fragrant summer drink.
Replace the water with sparkling wine or champagne and you will have a classy do,  and I am told that it can be used in a vinaigrette dressing too.
I use Sophie Grigson's recipe which is tried and tested, keeps and freezes really well. Try to pick blooms away from roadsides and those which are in bloom but with no trace of brown.


Ingredients


  • 20 heads of elderflower
  • 1.8 kg granulated sugar
  • 1.2 litres water
  • 2 unwaxed lemons
  • 75 g citric acid


Method

1. Shake the elderflowers to expel any little critters, and then place in a large bowl.

2. Put the sugar into a pan with the water and bring up to the boil, stirring until the sugar has completely dissolved.

3. Add the zest of the lemons to the elderflowers. Slice the lemons, discard the ends, and add the slices to the bowl. Pour over the boiling syrup, and then stir in the citric acid. Cover with a cloth and then leave at room temperature for 24 hours.

4. Next day, strain the cordial through a sieve lined with muslin cloth ( or clean tea towel), squeezing out the last drops for maximum flavour. Pour into sterilized bottles. Screw on the lids and pop into the fridge. Use plastic bottles if freezing leaving a gap at the top for expansion.


Friday, March 28, 2014

Mangeoire a poule


I have often glanced at these poultry feeders or 'mangeoires a poules' whilst perusing a brocanteur's stand and didn't really imagine that they could be put to much decorative use. Le brocanteur said that they were now in much demand and highly sought after. 
I could feel the price going up as he spoke. 'Très rare. Ancienne' he said.'Yeah', I thought.


But with a little imagination, they can be reinvented as neat little planters. Perfect for narrow window sills or any outside space. Fill with compost, sprinkle in some seeds of your choice - herbs would be practical. Feed, water, grow.

Or you could get a few chickens instead!


Friday, February 21, 2014

All that Jaz

The Jaz brand was born in the 1920's by a small group of engineers who realised there was a very lucrative market for alarm clocks. Getting the workforce up and out to work on time was not easy without them. The solution was to produce a quality, mass produced product that was still pleasing to the eye.

Why Jaz? Nobody really knows but possibly a cool name reflecting the musical influences sweeping the continent at the time.

These days, the clocks are highly collectible. I have several on Chateau Chic in perfect working condition with an alarm to wake the soundest sleeper. It's worth knowing a little more about the cockerel emblem on the face in order to date them more accurately. The emblem did not exist prior to 1942 and from 1942 -1967 the tail is pointing down. On later editions, 1967 and onwards, the tail is pointing up.


Classic alarm clock 1940's


1920's chrome clock


1940's Cream Bakelite Art Deco

Monday, February 17, 2014

Vintage bottle dryer

Vintage galvanised metal bottle dryers can be used in so many ways. I particularly like them for displaying teacups but I have also seen them used for drying herbs. 


I used this one as a quirky Christmas tree adorned with fairy lights. You can find the one below on Chateau Chic. It's the perfect size to sit on a worktop or counter.


Saturday, February 8, 2014

Getting the sack

At first glance vintage agricultural sacks don't look too appealing.

They are rustic and coarsely woven and often have a rather farmyard smell but none of this has ever put me off buying them.

I know that with a little gentle handwashing and care they can be made into the most wonderful, original chair coverings, cushions, table runners and even Roman blinds. There are probably plenty more ideas but I have enough to be going on with...

I only buy them if the mice haven't gotten to them first and I tend to buy unusual and colourful designs and then ponder what to make with them. Here is a chair that I have covered a while back. The stork design in pale blue worked perfectly with the French grey on the chair.


And an idea for my next project...


Friday, January 24, 2014

Vintage soda syphon


You can't help but be attracted to the striking blue of these vintage soda bottles. They catch my eye whenever I see them at the markets and whilst they were a very common sight in the 1920's and 30's very few of them have survived intact.

I now have the beginnings of a collection, well two is a good start. Both of mine are in perfect condition and I waited a long time to acquire them. I place them on the windowsill in my kitchen where they are naturally backlit. They look different throughout the day depending on the light and weather.

Bars and restaurant owners would have taken these to a facility where they would have been recharged. Can you use them? Not really. The pewter tops require special removal but they make a stunning focal point.


Saturday, January 18, 2014

Lampshade tutorial

You can easily transform a lampshade by recovering with fabric of your choice. If you don't have one already, they can be picked up really cheaply at junk shops or yard sales. 

First of all, gather everything that you need:-


  • plain lampshade
  • fabric
  • large piece of paper ( a length of wallpaper is ideal)
  • scissors
  • pencil
  • straight edge
  • spray fabric glue (repositionable)
  • glue gun
  • cutting mat and cutter ( optional) 


1. Trace the lampshade onto the paper to create a template. Take time to do this accurately following the line slowly top and bottom and marking the start and finish point.


2. Join the edges with a ruler. Add 1cm to one of the vertical edge. This will create a neat finish where the edges join.


Add 1cm to top and bottom edges.


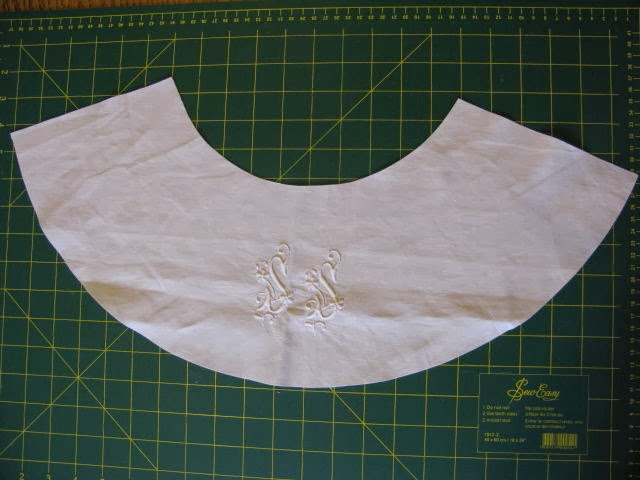
3. Cut out the template and then trace around it onto the wrong side of your fabric. If you are using a patterned fabric, be sure to position the template along the grain of the fabric. If you are using fabric with a motif or embroidery like mine, make sure it is central. Cut out the fabric.


 4. Spray the wrong side of the fabric with a thin layer of glue. Do this in a well ventilated area. Turn down the vertical edge with the 1cm allowance and glue in place.


5. Starting at the raw vertical edge, carefully roll the shade along the fabric, lining up the edges as you go. Most small creases can be smoothed out but you may need to peel it back from time to time to ensure it lays flat. The folded seam should neatly cover the raw edge where they meet.


6. When you are happy with the finish, tuck under the overlapping fabric at top and bottom. You may need a little glue from a glue gun at this stage to ensure it sticks firmly.


7. That's it. Sit back and enjoy your handiwork!